Loading...
play.grimurrp.com
Click to copy IP
This wiki serves as a documentation wiki intended to provide players information regarding server mechanics and gameplay.
The player-run wiki intended for documenting on server history and events can be found via the navbar (top of this page).
GrimurRP is a best server best played with friends, for that reason we highly recommend you play with a group. Groups that are recruiting can be found on our Discord or via the recruiting page on our forum.
Specifically for mechanics we highly recommend that players familiarise themselves with Seasons and Realistic Biomes, Guns, Vehicles, Gameplay Tweaks, FactoryMod and the Quick-Start page for Nodes (our land claiming plugin). These all form the core of the mechanics that differentiate the gameplay of GrimurRP from vanilla SMP.
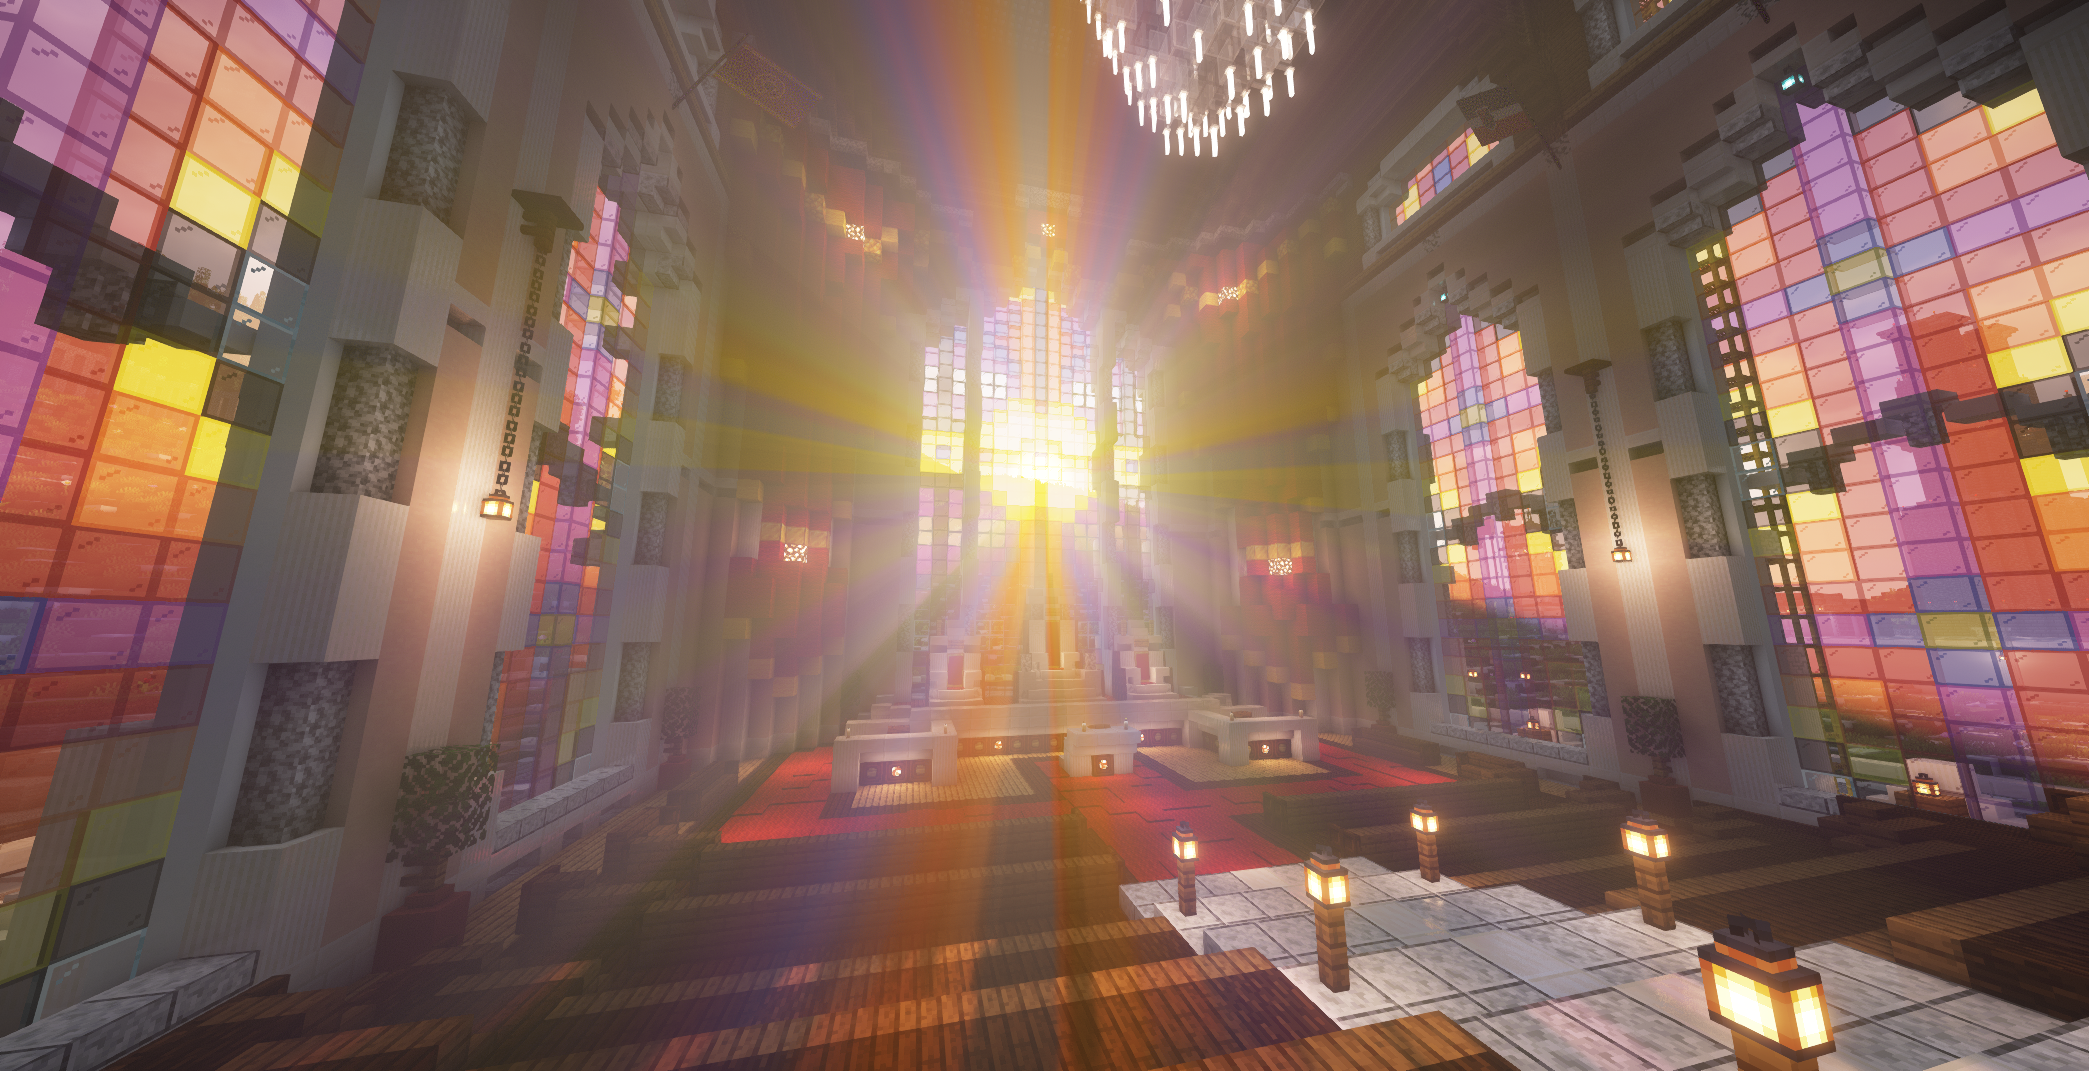
The pious of Drakoria have truly created a truly divine build here.
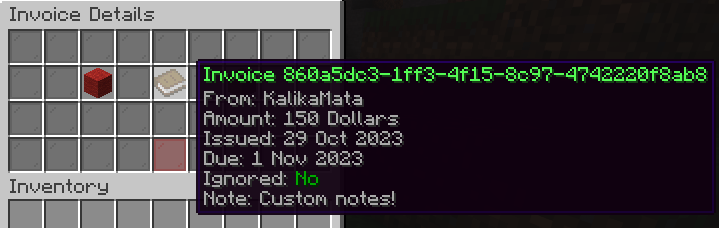
Three things are certain in life and with taxes being one of them it is important for one to keep up with their finances. Invoices is a plugin which adds a convenient way to manage all requested payments, whether they be from other players, plot upkeep or taxies levied by your towns mayor.
Note that interactions from other plugins, namely Nodes, are documented on their respective wiki pages.
/invoices - Main invoices interface.
/invoices send <playerName> <amount> (note) - Send an invoice to a player.
/invoices block <playerName> - Block a player from sending you invoices.
/invoices unblock <playerName> - Unblock a player so they can send you invoices.
/invoices help - Show help message.
There may have been interface and terminology change (eg dollars) since the time these screenshots were taken, they represent an internal alpha.
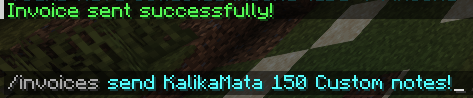
Sending an invoice to a player
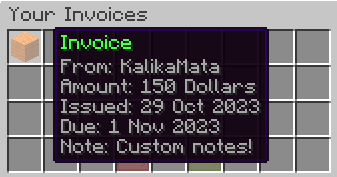
The received invoice from above, note that the wool colour adjusts based on the impending due date.
The above invoice when clicked on for further inspection.
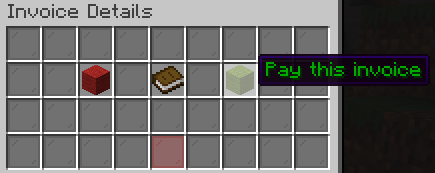
One can of-course pay out the invoice as charged.
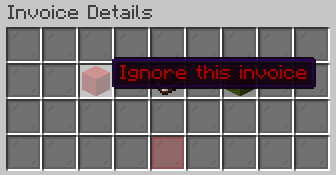
Or reject it if they feel inclined.
Once an invoice has been rejected it is no longer your issue.


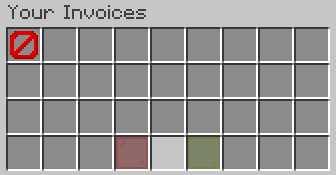
If someone is menacing you with stupid invoice requests block them, while on the topic it should be noted that an invoice can only be sent once every five minutes.
Smoking Pipes is a plugin which adds tobacco pipes into Minecraft. Smoking these tobaccos can give various potion effect buffs depending on the type, as Grimur has no potions these along with Brewery form a key part of server mechanics and gameplay.
A dapper gentlemen enjoying his tobacco.
Pipes are simple and intuitive to use, using it as as simple as having your tobacco pipe in one hand, your tobacco in your off-hand and right-click to go.
The two public recipes are available via /recipes, these include the regular and mint tobaccos.
Regular tobacco gives regeneration and speed, mint tobacco gives night vision and jump.
OpenRP is a plugin that GrimurRP uses to add character cards to Minecraft. These character cards allow a player to flesh out their in-roleplay character and have it accessible to other players.
/character
This will display the character field changer. The field changer lets players change their own fields, such as their name, description, pronouns...
To use the field changer, one must open the chat to click on the buttons.
/character set (field) (value)
This command is used by players to set one of their fields, such as their name, description, gender... to a specified value.
For example, you might do /character set name Kalika Von Mata to set your character's name!
/character check (user)
This will display the information of a player's character card.

A standard chat message with the Nodes plugin.
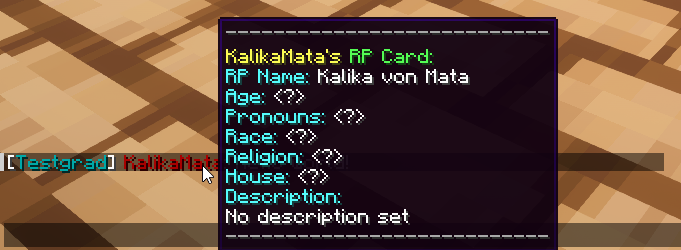
Hovering over the player's name will show their character card.

Hovering over the player's town will show their town, nation and other meta information about the player eg donator ranks.
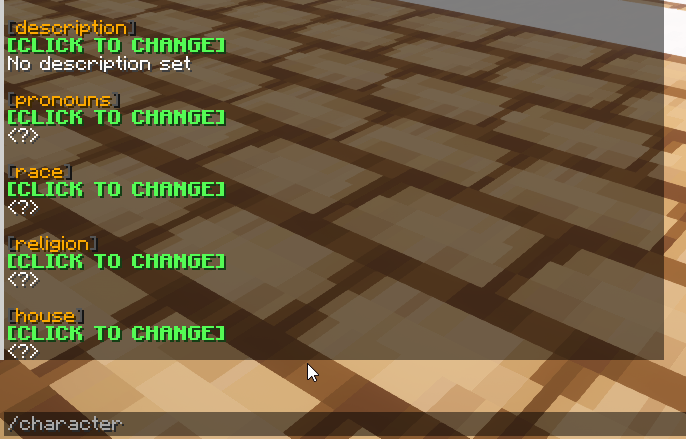
The output of /character, showing the current fields with a prompt to change them.

In this example I press the [Click to Change] box on my age and change it to 25.
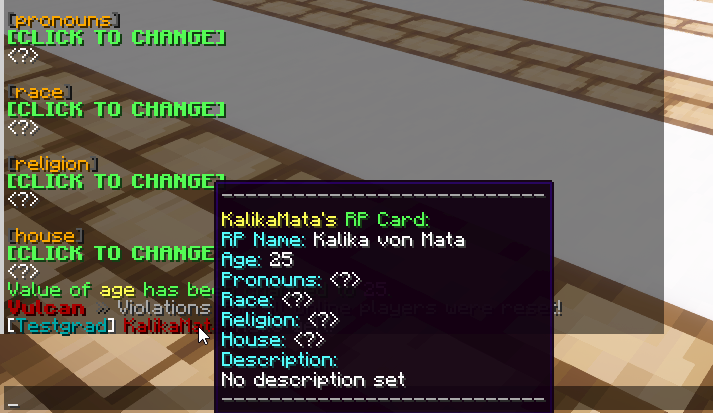
In this new message I send it now shows my newly set age.

One can even save profiles and load them as needed!

Using my newly saved profile.
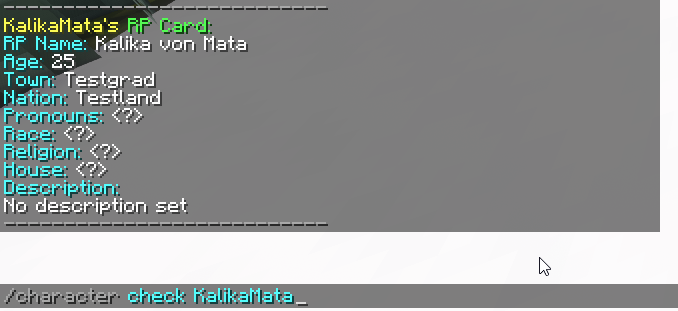
A command to check a player's character-card on demand.
Titles allow players to customize their prefix in global chat.
There are two distinct title types:
![]()

Titles can be changed via the command /title where a player can set their title according to those they have available in their rank or have purchased. Both standard text titles and emoji titles can be purchased on the store.
Check the above hyperlink for information about RealisticSeasons, note though that RealisticSeasons wiki regarding mobs and crops is inaccurate to our configuration.
GrimurRP adjusts crop growth times to be much longer (on the order of hours or days). Crop growth times are also biome-dependent with certain crops will not grow in certain biomes at all, they also alter based on the current season. This is done in order to balance Experience production, where crops are a primary component, and to encourage trade between nations. Animal breeding times are also increased, and certain animals can't be bred in certain biomes.
There are two types of growth rate:
Fixed (Persistent plants such as wheat, potato and beetroot) : growth rate given in hours
Percentage based (Non-persistent plants such as cactus, melon, mushroom) : growth rate given as percent of vanilla growth chance.
Returns the growth time of the item in hand at the free block above the block you're hitting, or the block on the side relative to where you're hitting if it is not the top side. For cocoa for example, you will want to hit a jungle tree on it's side to get meaningful growth time. This growth time includes all factors such as biome, light, and surrounding blocks. You can also do this with fishable items, but in this case the fishing probability will only be reported if it is not zero to spare you from chat spam.
Returns how long it will take until fully grown for fixed growth time crops. This can also be done to view animal growth rates (as fraction of vanilla).
/rb which brings up a GUI containing the growth rates of plants in current biome.Growth rates are generally lowest in realistic or reasonable corresponding biomes. For example, the biome of deep ocean has one of the worst growth rates. ReaslisticBiome's also changes fishing probabilities and one can hit the ground with a fishable item to see its fishing probability (if it is not zero). Fishing is restricted to water biomes.
The growth rate of a tile can be improved by placing clay blocks directly beneath. Placing more than 4 clay block below will not improve the rate further. Two exceptions exist.
Crop growth is persistent for fixed crops, meaning they will continue to grow when chunks are unloaded.
Most plants need sunlight, either directly above, or through transparent blocks such as glass. This is not the case for netherwarts and mushrooms.
Placing a glowstone (or redstone-lamp block above or adjacent to a crop lets the crop grow (albeit slower) in situations it normally would not, this includes underground crops but does not include crops which are in inhospitable biomes. To grow pumpkins and melons with greenhouse, place the glowstone block adjacent to the free block where the fruit block will grow, and block all other free spots so that the fruit can only grow next to glowstone.
Guns are a key mechanic for combat on GrimurRP. Guns are created via Factories and come in various types:
Pistols, rifles, flamethrowers etc.
Guns on GrimurRP are simple to use, left-click to fire and shift to improve accuracy (and aim down sights if enabled)
Aim down sight animations can be enabled and disabled via /ads.
Vehicles are a key gameplay and mechanics plugin on GrimurRP. They are used to add a wide array of sweeping changes to how the game is played.
All vehicles can be mounted via right-click, if vehicles require ammo this can also be done via right-clicking with the correct item in the correct position.
Vehicles use coal as their fuel.
18/12/2023: Known bug, do not place down vehicles if holding a stack of them.
Trains allow for mass transport along railroads, they are the fastest and cheapest form of transportation available on GrimurRP. Trains require coal in their coal cart to keep moving. Carriages can be attached/removed from the train at will. Each carriage has eight passenger slots and an infinite amount of carriages can be added, this means they are truly the best option for mass transportation.
Transport ships are intended for open-sea sailing and have six passenger seats aswell as the driver seat. They require coal to run and are purely for transport.
Riverboats are intended for river sailing and have two passenger seats aswell as the driver seat. They require coal to run and are purely for transport. These are cheaper when compared to the transport ship and have the ability to navigate up and down Y-level wise.
Planes are primarily a war vehicle and feature a machine gun on their front, similar to the maxim gun. They require coal to operate and additionally require maxim gun belts to shoot. Planes have a very high skill ceiling and can be absolutely deadly in the hands of the right player, contrary to popular belief they can be very accurate.
Maxim Guns are used for providing rapid fire, they have a downside in that they are fired from static positions and are clunky to setup and dismantle. As a result they most often favour defenders. Maxim Guns are by and large the quickest DPS that the server has short of being hit point blank by an artillery shell. Maxim Guns require maxim gun belts to utilise.
Jumppacks are used for mobility, they give the user the ability to make a large jump at the cost of water bucket. While they represent an investment they are great for getting your soldiers out of enemy traps, or breaching over walls.
Artillery has two types of shells that can be used. High Explosive Shells are the main option, they can rain down upon enemy positions. They cause both immediate player damage and block damage (block damage rolls-back after 3 hours and cannot blow up container storage types). This is contrast to the Chorine Gas shells which while just as lethal end up being more situational, don't underestimate them though.
Parachutes are used to soften falls, when enabled a player will open up the parachute and fall safely down to the ground. These are perfect for falling out of a plane or blimp in-tact. Opened parachutes can be picked up and later repacked via their factory.
Blimps are a transport vehicle which can carry two passengers and the driver. They are best thought of as flying horses in terms of the speed and flexibility they offer. They are very vulnerable to fire from maxim guns. Blimps require coal to fuel.
This page will be worked on later, for now check out Manacube's awesome guide which is entirely applicable to GrimurRP.
This page will be worked on later, for now check out the CivWiki's awesome guide which is entirely applicable to GrimurRP.
Only key changes on GrimurRP vs the CivCraft/clone implementation is that there is no groups management via NameLayer, instead it is integrated into Nodes and transactions can be locked down via the permissions group SHOPCHEST. This can be assigned onto plots for micro-level tweaking (eg, a shop that only town members or specific players can use).
This page will be worked on later, for now check out the CivWiki's awesome guide which is entirely applicable to GrimurRP.
Note: RailSwitch does work with trains, the driver's preferences are assumed to be the intended end destination. However, players should mind how much space they give between activation and the turn as trains require leeway when travelling at max speed.
This page will be worked on later, for now check out the CivWiki's awesome guide which is entirely applicable to GrimurRP.
Staff member TheLoudGrinder has made a wonderful guide on Youtube:
This page will be worked on later, for now check out the CivWiki's awesome guide which is entirely applicable to GrimurRP.
Note: GrimurRP has a different configuration then CivMC or other CivCraft servers referenced in this wiki, information here should be used as a guide on how to use the plugin.
Daily login rewards and voting rewards offer a way for players to get EXP (including emeralds/variants) proportional to their activity. This is important as mass produced EXP is only available via factories which require a variety of crops that can take hours if not days to grow with great biome diversity. Think of these rewards as akin to a Universal Basic Income (UBI) payment, they allow for players to pay for upkeep of their towns (if small enough towns with enough people) or otherwise participate in the server economy.
GrimurRP provides daily login rewards to incentivize player engagement. These rewards can be claimed daily after one hour of online time. These rewards increase in quality daily until a full week has been reached, which gives you a weekly bonus before the cycle repeats.
Rewards can be claimed via /rewards.
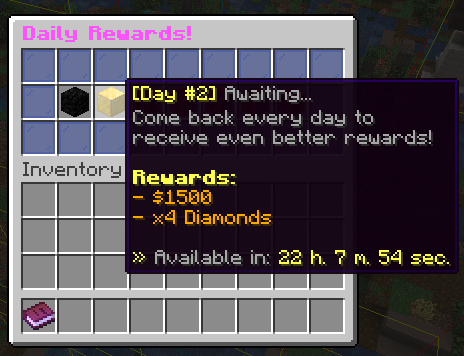
Note that the specific rewards here are not indicative of live values (this was written during development).
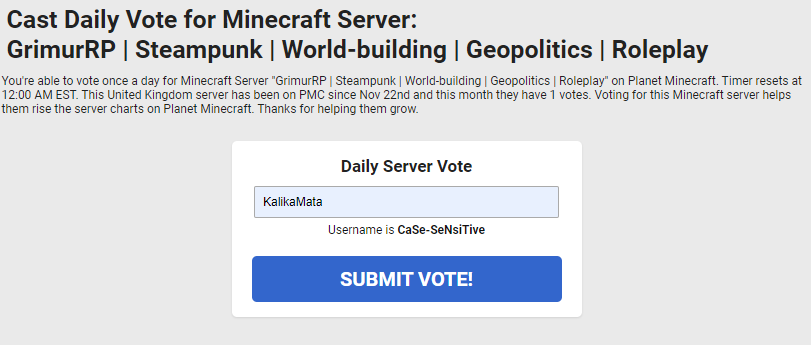
On top of daily login rewards it is also possible to gain additional rewards through voting.
You can run /vote to open up the voting screen.
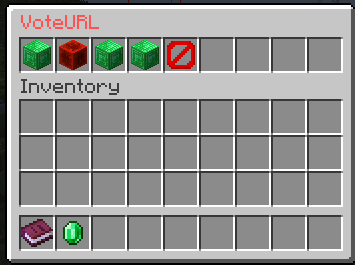
Following this you will need to follow the instructions as presented on the website. Usually for most sites this entails pressing a "Vote" button followed by typing in your user-name.
Can animals die from poor hyenine and cramped living conditions? Yes! Learn about how this may affect your plans for inhumane industrial farms today!
The plague works in stages.
1) Symptoms and weakness: During this stage the animal becomes weaker and symptoms will start to appear.
2) Spreading: During this stage the infected animal will start to infect others.
3) Death: In this stage the animal is killed. An infected animal is contaminated and unfit for consumption, rotting flesh is it's only use.
A plague may break out if 30 animals are within a 16x16x16 3D cuboid region.
There is a two minute window between infection and the beginning of the spread, there is a 90% chance of animals in close proximity to be infected. After this point the animal has 45 seconds to live.
As many might have noticed this is basically a roleplay-friendly way to implement mob farm controls, the real solution is merely to avoid cramming mobs together in a small space or only actively breeding mobs that you intend to cull within a reasonable time-frame.
The survival debug stick is effectively a debug stick clone but made for vanilla play. It has potentially destructive or overpowered changes disabled, this allows for actions like changing the rotation on blocks.
Only blocks you otherwise have permissions for (plot/town restrictions) can be altered via the survival debug stick.
Chunk limits are introduced to prevent player abuse and lag machines, not that staff may still take action and request alteration to redstone contraceptions even if they meet these hard requirements.
Per chunk they are as follows:
These restrictions can be seen via /chunklimits
Elevators are methods of vertical travel, going either directly up or down. On GrimurRP an elevator is a Lodestone block.
While standing on a lodestone, you can left click or press shift to go down, and right click or press spacebar to go up, the exact controls can be changed within the /config command. Your "destination" must be another lodestone which is in-line vertically with your current lodestone.
Many consecutive lodestones may be chained vertically to create "floors". Right click or jump multiple times to go up multiple floors, and similarly for going down multiple floors.
To be considered a valid elevator, a lodestone must have at least 2 blocks of air above it. Signs, fence gates, or other non-solid blocks will not work, the 2 blocks must be pure air.
The only items that can be placed in enderchests (created via factory) is experience bottles, emeralds and emerald blocks.
Our most prominent Artificers have reversed engineered a marvel of technology from the past. They call it the Anastasis Anchor, it works by reanimation of those teetering on the edge of death. The machine seemed to work only on individuals whose souls still clung to their physical form, as if it were designed to anchor them from embarking on the final journey into the afterlife. This technology will change the face of war and life in Grimur as we know it.
As an alternative to town spawning, players are also able to spawn to their set anastasis anchor from the main server spawn upon death. If a player has an anchor set (right click on a charged anchor) they can run /anchor from spawn, this will teleport them to their anchor and deduct one charge.
Anastasis Anchors are fueled via gold blocks, these can be dispensed via Redstone or by hand.
An anastasis anchor cannot be picked up once placed
PermissionsGranter is our in-house plugin which handles the ability for donators to grant out access to their exclusive content to those they wish to have access to it.
/permmanage assigngrantee: Assign a grantee to a permission that you own./permmanage removegrantee: Remove a grantee from a permission that you own./permmanage list: Lists out permissions owned or granted to you./permmanage overview: Overview of a permission owned by you with all owners/grantees/permmanage help: In-game help command, features hover text to further explain command
All commands can be executed in part for a comprehensive overview of how to utilize them. Permissions are usually named according to a certain syntax for your nation/town, when custom permissions have been created for you per a ticket you should run /permmanage list, feel free to ask staff for any/all questions with this :D
Nodes is a plugin which GrimurRP uses to manage land claims, it is one of the key plugins featured on the server.
1. Map segmented into pre-created territories which are groups of contiguous Minecraft chunks.
2. Territories have different resource nodes which provide passive resource income generation.
3. These territories can have a different tier resource node (one through ten) assigned to them based on builds quality/development, these resource nodes multiply existing resource income and increase claims timers during war.
4. Players form a town which controls territories. Initial territory claims must be connected.
5. Territories can either be core or non-core territories. Core territories represent urban regions and have higher upkeep but greater resource generation, non-core territories inversely have lower upkeep but lower resource generation.
6. War is capturing territories from another town or subjugating enemy towns, non-core territories can be seized while core territories always remain apart of their original towns (even if subjugated).
7. Towns choose 1 territory to be their capital, players can teleport to their town's capital from the server spawn.
8. Both towns and nations pay upkeep, towns can levy taxes on their members and charge rent for plots. Nations can levy both resource percentage and taxes (proportional to town's resource generation and upkeep respectively).
All mechanics related to Nodes are meticulously written about in depth in the sub-pages, for those wanting a brief overview of mechanics feel free to read the quick-start guide here. Those aspiring to run towns should read the town leader's overview.
/town or /t for short is the main command.
/nation or /n for short is for nation management.
/nodes or /nd for short has commands with info about the Nodes world.
/gc, /tc, /nc, /ac, /lc for changing your chat channel (who can see your messages)
(Global chat, town chat, nation chat, ally chat, local chat) All above commands can be followed by mute/unmute.
Request to join someone's town with /town join name, where name is their town name.
See ingame territory map using /t map or /t minimap
View a territory's resources with /nd territory
This is intended to be a user-facing guide for the average Joe explaining the mechanics for war periods, those leading towns and nations should check the "Diplomacy and War Management" page.
While wars can be declared by nation leaders at any time, fighting is isolated to so-called "War Periods". This allows for groups to properly rally for large battles and to allow for fair play.
War periods can be split into two different kinds:
The timeslots for war periods is as follows:
All wars begin at 5PM GMT.
It is required to mature an account by having joined a town for atleast 48 hours before it is able to participate in war. This is NOT required in-game hours online, this is time since having been in your town. This time may be upped in the scenario of abuse. Players who do not meet requirements are unable to place warflags, damage other players with melee/guns and have a perpetual two hearts until war is over.
TODO: include screenshot showing where players can attack from
Attack enemy's territory by putting down a fence block in a chunk (fence is a "flag"):
Each territory has a home chunk indicated by an "H" symbol on the map (/t map or /t minimap).
Towns are entities that control territories on the map and are made up of their residents.
Type /t create name, replace name with the name you want. It's worth noting that town creation costs 15% of the territory cost it is founded on, players are encouraged to use their login daily rewards and voting rewards to quickly place down their towns. You can add spaces to your town name by using the underscore _ character, this will show as a space in town info and other screens.
Invite other players with /t invite playername
/town create: Create town with name at location
/town delete: Delete your town
/town promote: Give officer rank to resident
/town demote: Remove officer rank from resident
/town apply: Apply to join a town
/town invite: Invite a player to your town
/town leave: Leave your town
/town kick: Kick player from your town
/town spawn: Teleport to your town spawnpoint
/town setspawn: Set a new town spawnpoint
/town list: List all towns
/town info: View town details
/town online: View town's online players
/town color: Set town color on map
/town claim: Claim territory at current location
/town unclaim: Unclaim territory at current location
/town prefix: Set player name prefix
/town suffix: Set player name suffix
/town rename: Rename town
/town map: View world map
/town minimap: Toggle sidebar world minimap
/town permissions: Set town protection permissions
/town protect: Protect town chests
/town capital: Set your town's home territory
/town annex: Annex an occupied territory
/town outpost: Town outpost commands
/town core: Town core management commands
/town contest: Town claim contest management commands
/town board: Set your town's board
/town waypoints: Toggle waypoint sending to client for war (FlagWar attacks) (JourneyMap)
/town togglepvp: Toggles town's PVP.
/town forgive: Forgives a player's debts to town
/town sphere: Manages sphere claims
Town info screen via /t info
Towns have access to the board command via /t board Messsage to set a custom board that players see when looking at /t info for your nation.
Towns can set their desired colour on the web map viewer via an RGB value by doing /t color.
It is possible to toggle on and off PVP in your town (pending cooldowns) via /t togglepvp
This is my /t info after having run /t togglepvp
Towns owe their town claims * 0.05 as an amount of upkeep daily for their continued existence, this upkeep is proportional to claim power in use, this upkeep thus becomes an essential to meet. Towns are offered two mechanics to assist in raising funds:
To charge a tax to all players in the town a mayor or officer should run /t levytax AMOUNT. By default players have three days to pay this tax.
With our plugin suite and it's associated mechanics I personally would love to see players get creative with how they decide to fundraise: start some state enterprises, run a lottery, start up a casino. The sky is the limit and if there any ideas you have to improve upon player freedom always feel free to lodge a suggestion on this website.
It is possible to check quickly players who are inactive, have not paid their taxes or both. Afterall it is the duty of any mayor to make sure they have a population of respectable citizens. When running /t info it will show active and tax compliant players in white, owing tax but active as yellow, inactive as golden and inactive and owing tax as red. This information also can be found by running /player PLAYERNAME.
If your town should be unfortunate enough to either fall in war or surrender before or during battle it will be plundered and following that will be conquered, this mechanic forces a town to be affixed to their nation for a two week period and within that time extra levies for both economic and resource taxes may be done by the occupying nation. It is optional for the occupying nation to unconquer your town before the set time but this would be unlikely in most scenarios.
Testgrad has fallen on some hard times and has been both plundered and conquered by the fiendish Testlandians.
When a town is plundered a TBA percentage of their regular upkeep payment is paid out directly to the plundering nation, it is then put into cooldown.
Since 18/12/2023 it has been possible to claim territories in a pseudo fashion called "Sphere" claims. These claims cost 10% of cost (and thus upkeep) but do not generate resources. This type of claiming is particularly useful for claiming infrastructure, aswell as providing your town more buffer space.
The management command for your sphere claims is: /t sphere
Sphere of Influence claims can have new towns made over them or be claimed over (by conventional claims) at ANY time. You cannot claim normal claims off a sphere of influence claim.
Sphere claims and normal claims can be distinguished on the map /t map and the minimap /t minimap as they have an "S" in the middle as opposed to a "H".
Nations are entities that have one or more towns. These can be either free towns (joined to the nation via their own volition) or subjugated towns, affixed to their nations because of defeat or surrender during war. Nations are essential for engaging in diplomatic actions (alliances or war). All decisions made relating to a nation are made by their capital town.
Type /n create name, replace name with the name you want
Invite other towns with /n invite townname
/nation create: Create nation with name at location
/nation delete: Delete your nation
/nation leave: Leave your nation
/nation invite: Invite a nation to your nation
/nation list: List all nations
/nation color: Set nation color on map
/nation unconquer: Unconquer a town within your nation
/nation board: Set nation board
/nation longname: Set nation long name, %nation% placeholder for name
/nation settax: Set tax rates in a town
/nation taxes: Tax rates overview
/nation kick: Kicks a town from your nation
Much like towns, nations have access to the board command in this case /n board Messsage to set a custom board that players see when looking at /n info for your nation.
Also much like towns, nations can set their desired colour on the web map viewer via an RGB value by doing /n color.
Unique to nation customisation it is possible to set a long-name via /n longname which are meant to represent formal names for nations, think what the People's Republic of China is to just China.
Nations much like towns require their own separate upkeep, specific amount TBA but proportional to the upkeep paid by their towns therein. To pay for this upkeep aswell as fund your aspiring empire it is important to levy taxes.
Nations (via the capital town) levy taxes in the form of both direct currency and by taxing parts of their passive resource generation. These tax rates can be set by town within their nation and the max rate that can be set depends on whether it is a free town or a conquered town.

Taxes overview screen from /n taxes
In the taxes overview you can check the default free and default conquered economic and resource tax rates for towns, aswell as the max settable rates for both free and conquered towns.
There is a mechanic called effective rate which is based on the distance away from the capital town from that town's closest territory to it, as a general rule at about 3000 blocks away the effective tax rate will begin to plummet. It modifies the eco and resource taxes by itself, for instance an effective rate of 100% means you get all eco/resource taxes levied while for an effective rate of 33% you would get a third.
Resource taxes levy from the nations passive resource generation. Economic taxes levy separately from a town's already existing upkeep, they are intended to help pay for the nations upkeep. It is important to know that that towns will be able to see your set nation taxes aswell as the overall respective input relative to national upkeep, this could cause... discontent...
Plots are a main feature of Nodes and players great creative freedom in how they play the game:
Plots are cuboid regions and could be as small as a 2x2 or as large as 200x200.
/plot select: Toggles the ability to select positions for plot creation
/plot create: Creates a plot with name at location
/plot delete: Delete a specified plot
/plot show: Shows all plots around you
/plot list: List all plots owned by a player, by town, or by territory
/plot info: View plot info at current or specified plot
/plot rename: Rename plot at current location
/plot permissions: Set plot protection permissions
/plot protect: Protect plot chests
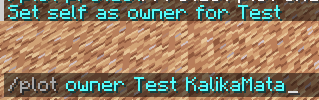
/plot owner: Requests a player or sets self as plot owner
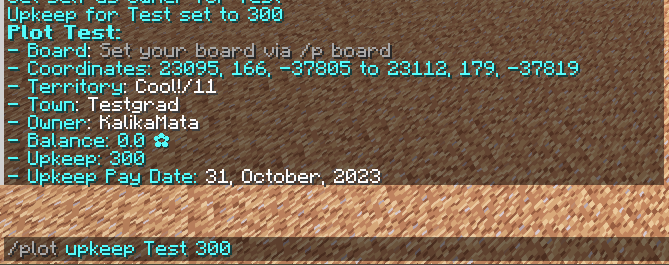
/plot upkeep: Sets the upkeep payment for the plot
/plot accept: Accepts specified plot invitation
/plot deny: Denies specified plot invitation
/plot saleprice: Sets the sale price of the plot
/plot expandvert: Expands current selection to bottom and top of world
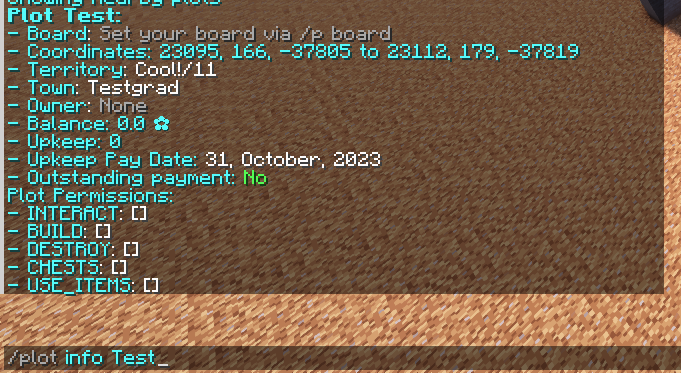
Overview of /plot info for my testing demonstration plot.
Plot permissions management follows the same syntax as the town permissions management and information can be found in the permissions guide for configuring them as wanted.
Information about how plot upkeep/rent payments are made can be found on the Invoices page.
Plots carry over the same /t protect system used to create item storage containers (chests, barrels etc) that are only usable by those assigned the permissions group TRUSTED, in this case it is /p protect
1. Find a suitable space (not intersecting other plots by running /p show)
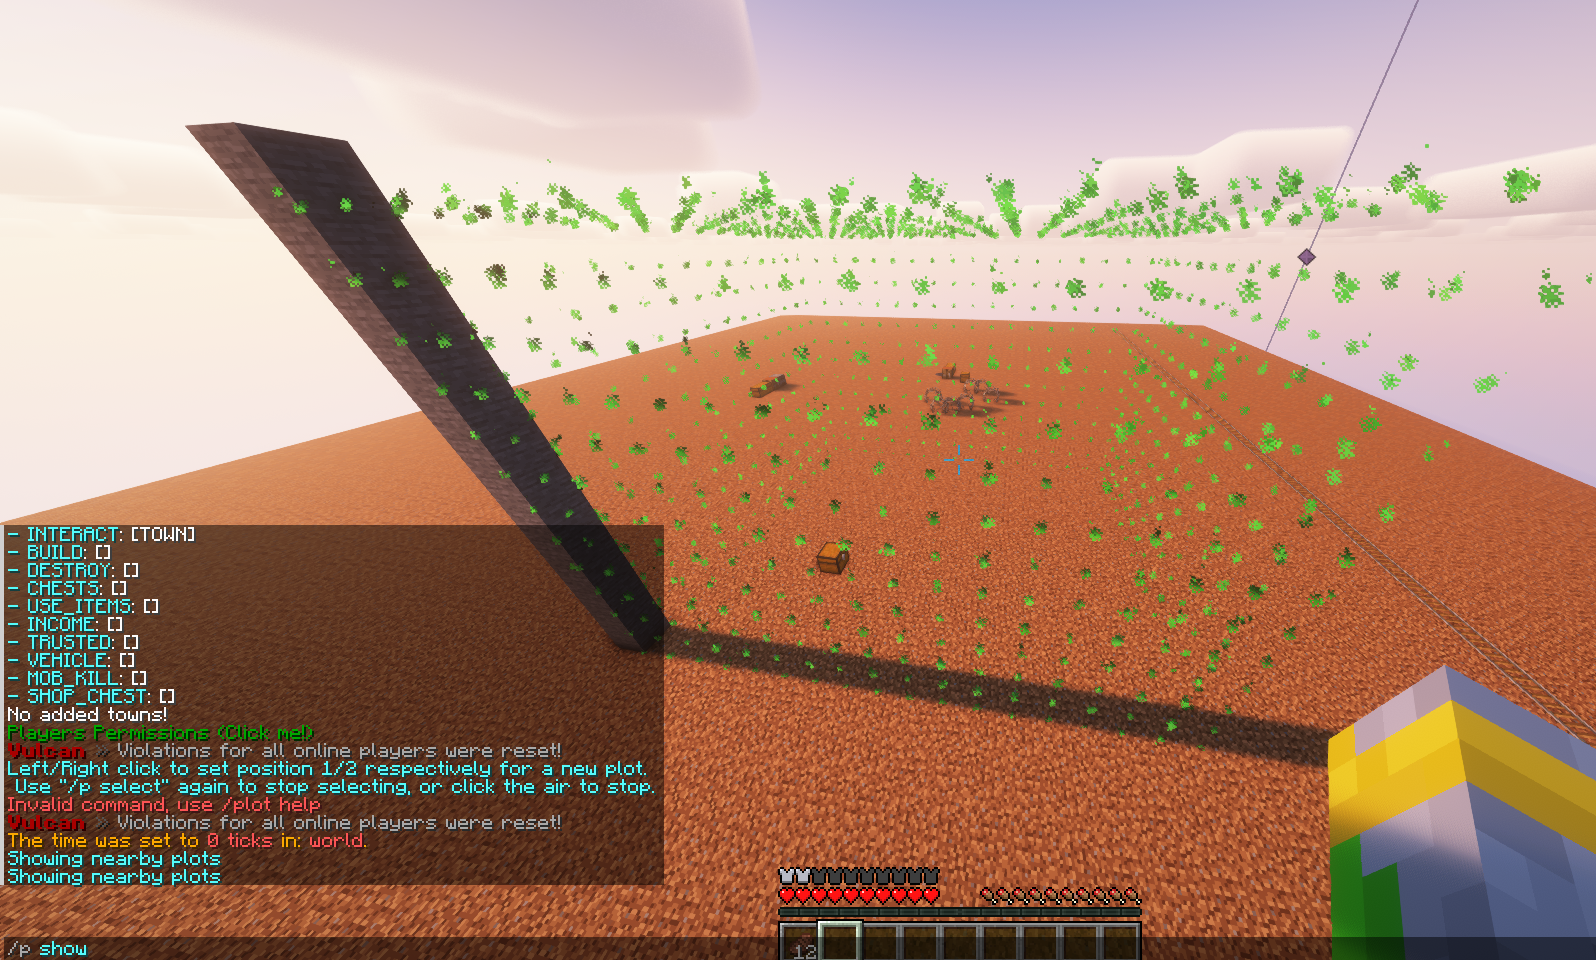
In this example the plot I will later create shows in an outline.
2. Run /p select to begin selecting the first position and second positions

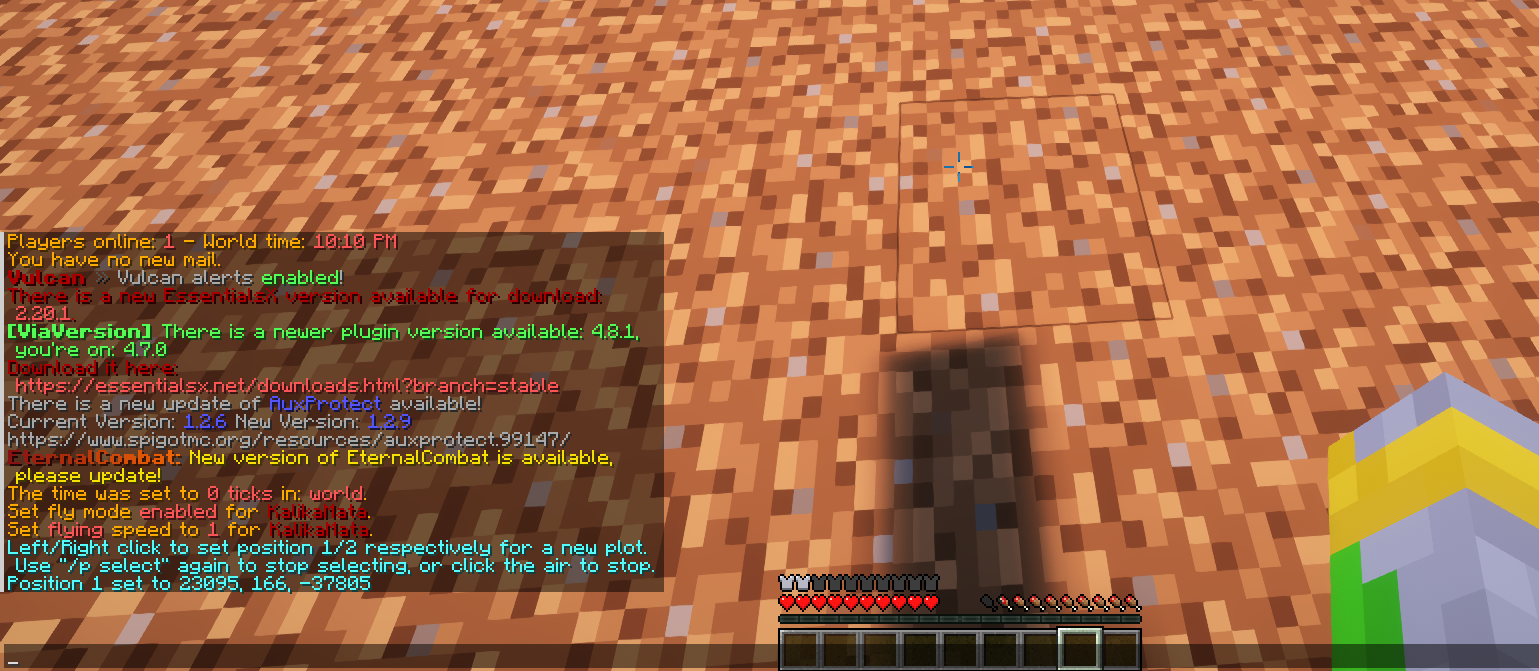
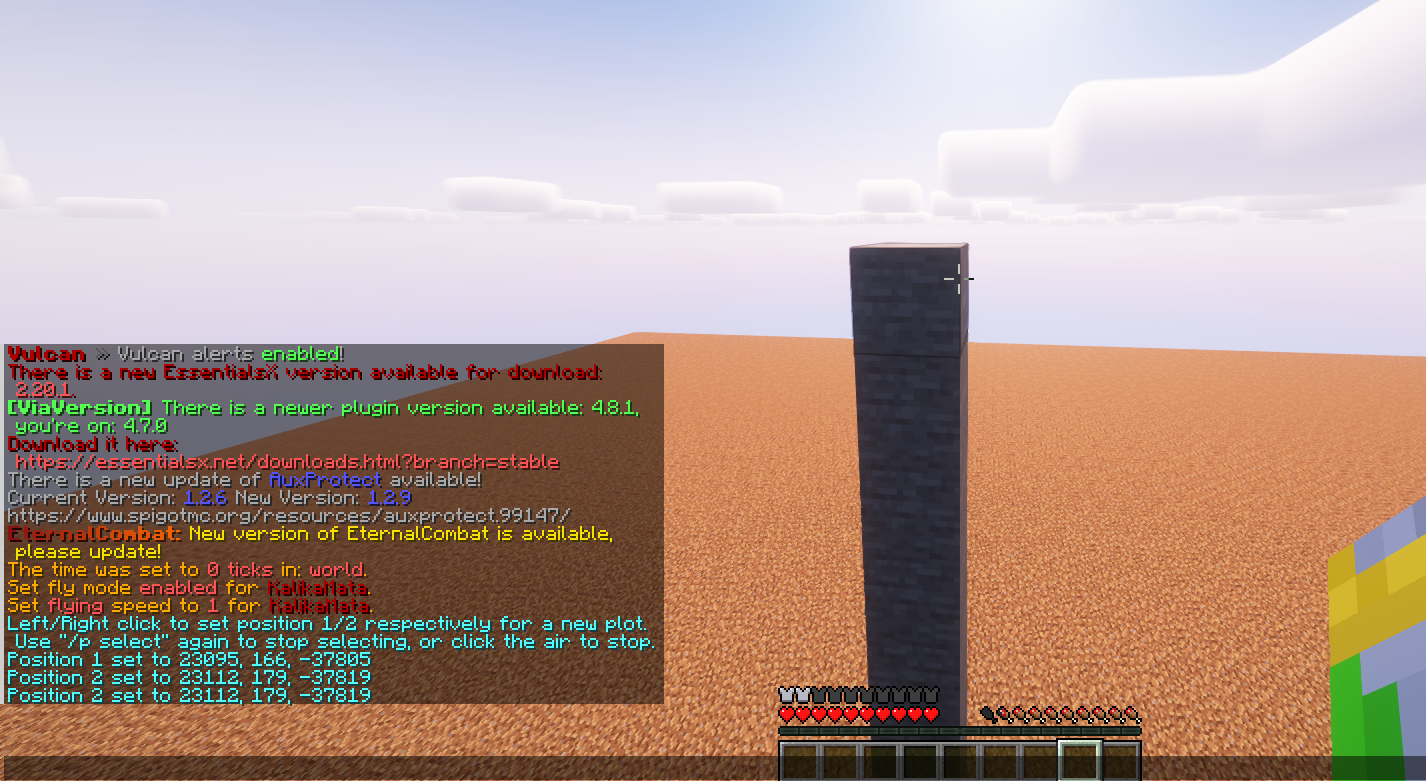
Note: I can expand my selection vertically from Y 0 to 256 via /p expandvert
3. With my selections now in place I simply run /p create Test, where Test should be your desired unique name.

4. To check my newly created plot I can either run /plot info Test or run /plot info from within its borders

5. The plot is ready and can now be assigned an owner, if you want you can also set a sale price for this plot via /plot saleprice Test. But in this example I will assign the plot to myself (TODO: Revisit this tutorial when I have another person to demonstrate this with.)
6. If desired you can begin charging rent by setting the upkeep of the plot, to do so run /plot upkeep Test *Amount*.
Is war merely the continuation of politics by other means? I unfortunately am not qualified to answer that, but I can teach you how to wage and manage them.
The in-game process for actually starting a war is remarkably easy, just don't be in truce with the intended war recipient, be within diplomatic range (approx 1.5k blocks away from closest town's closest territory) and run the command /war declare name wherein name refers to either a nation or town.

Truces can be checked via /truce name, no argument passed in shows your own truces.

The evil Testgartians will be subjugated. TODO Replace with new command syntax.
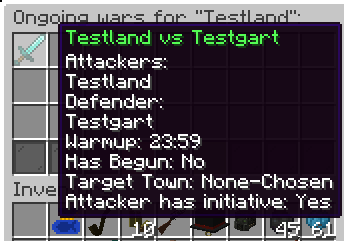
Following a declaration of war it is possible to see what wars your nation/town is involved in via /war list name, if there are no arguments passed in it will show your own nation/town's wars. This screen will show some key information relating to a war, some of these require explanation.
Attackers and Defenders: Allying other nations does not mean that they immediately involved in all your wars, allies must be invited to join the war (they must not have a truce blocking them against the primary enemy nation in your war) via the command /war invite.
Warmup: There is a 24 hour warm-up after the declaration before any action can begin, this time is intended to allow nations to prepare their diplomacy and towns for the impending war.
Has Begun: Merely a reflective statement of the above to indicate if the warm-up period has expired.
The war system employed has a key mechanic called initiative, on GrimurRP FlagWar is limited to the confines of the Target Town which is set by the side with initiative. At the beginning of wars the attacking nation always starts with initiative first. Initiative is kept by continually making progress during war periods against the enemy towns territories, ending the war period while occupying atleast one new territory meets this criteria. In contrast, failing to make any progress during the war period flips the initiative to the enemy.
In line with our war period scheduling it is required for the side with initiative to set their desired Target Town within five hours of the current war period ending. This set town will then be able to be fought over during the next war period.
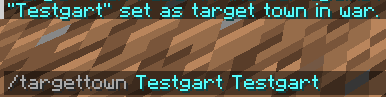
Alternatively it is also not required to set a target town, this can be used to create a soft truce in a war. Although initiative will automatically flip to the other alliance following the sat out war period.

Not specifying a target town merely results in resetting it to none.
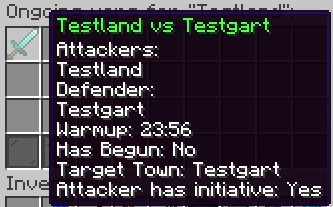
The war-list now reflects the changes made to my desired target town.
Economic ruin, no armaments and a generation of dead and shell-shocked? You might be eligible to make peace.
There are both alliance-alliance treaties which end an entire war and alliance-nation treaties which peace out an individual participant.
Peace treaties can involve the surrender of territory from your town, the surrender of towns within your nation and item exchanging between both sides. Any treaty made will result in a two week truce.
Run the /peace command focusing on the main alliance leading nation or town (if a nation vs town war)
It is possible to run /peace additionally when not actually in war to trade territory and resources, this can be within a nation or externally.
Territory resources are defined by resource nodes. These resource nodes have an associated passive resource income generation or modifiers associated with them.
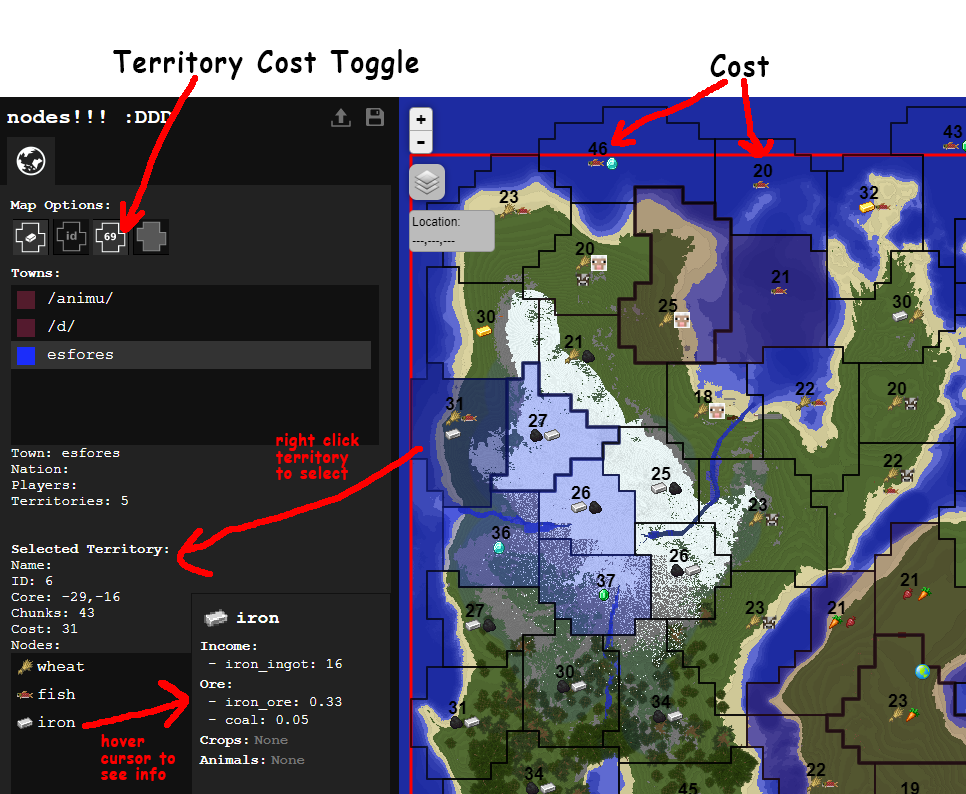
Use /nd territory in the region you are standing in to see its resources. Or use the Dynmap web viewer to see the map and all territories/resources.
Nodes uses a point system called town power for claiming territories. Each territory has a different cost depending on its size and resources (see below).
You get an initial max claim power allowed for choosing a territory to create your town in.
Afterwards, adding players to your town increases its max town power to claim territories. When a player joins a town, they add a initial amount of power, then their power contribution increases over time to a max value.
Example of this system:
A player's power does not decrease after it is accumulated if the player is active. But if a player leaves their town and rejoins later, the player's power is reset and has to accumulate again. Likewise claim power is reset if a player is inactive (one week with no login) you can check the player via /player name or get an overview in /t info for inactive players (check the town management page for more information on this).
The dynmap viewer has an option to turn on territory cost overlays in each territory (as shown above).
Town power and player power ramp is intended to reward player play time and reduce the impact of alt accounts (i.e. put alts in town, get free territories).
When you unclaim a territory, your town power gets a temporary penalty equal to the territory cost. Example:
This is required so towns cannot rapidly claim/unclaim territories to swap resources.
When your town is over its claim power limit, your town will have a resource penalty in all territories (default 50% penalty to income, ore drops, crop growth, and breeding rates). This can occur if players leave a town.
You will need to either get more players or reduce your town size by unclaiming territories and waiting for the unclaim penalty to disappear.
This penalizes groups that move players back-and-forth between towns to claim more territory.
Territory cost model:
cost = base + rc + rs * a * chunks
base = base cost
chunks = size of territory
a = fixed scale factor per chunk (so larger territories cost more)
rs = resource scale factor (e.g. shitty resource wheat rs = 1, rare resource diamond rs = 2)
rc = resource constant factor
For territories with multiple resources, rs and rc are the total from all resources: rs = rs1 * rs2 * ... and rc = rc1 + rc2 + ....
Resource scale factors enforce that a large territory with a rare resource is more expensive than small territory with same resource
Nodes features an extensive permissions system allowing for micro level customisation for towns and plots. Whether as basic as locking chests to your officers in your town all the way to plots that specifically allow only certain players to use Shop Chests.
Thankfully for players the towns and plots follow the exact same syntax and command structure for setting permissions, ensuring that it is user friendly and easy to make your desired changes.
interact: Interact is the overarching permissions required for all others to work, interact allows for: using buttons, pressure plates, doors.
build: Build allows for the placing of blocks.
destroy: Destroy allows for the removing of blocks.
chests: Allows players to open up container objects: chests, barrels, furnaces etc.
use_items: Unused permission category.
income: Allows players to open up the /t income screen and to withdraw items.
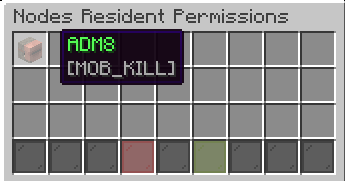
mob_kill: Allows players to kill mobs.
trusted: Allows players to access chests protected via either /t protect or /p protect
shop_chest: Allows players to make trades via Shop Chests.
all: Grants all permissions above (potentially dangerous).
town: Everyone in the town, if using plots applies to all people in the town plot is present in.
nation: Everyone in the nation except conquered towns, if using plots applies to all people in the town's nation plot is present in.
ally: All allies of the town/nation, if using plots applies to all people in the town/nation's allies plot is present in.
officer: All officers of the town, if using plots applies to officers in the town plot is present in.
outsider: Every player, potentially dangerous be cautious if granting this.
othertown: Everyone in the town specified, if using plots applies to all people in that town.
person: Specific player, if using plots applies to just that specific player.
conquered: Everyone in the nation from conquered towns, if using plots applies to all conquered town players in the town's nation plot is present in.
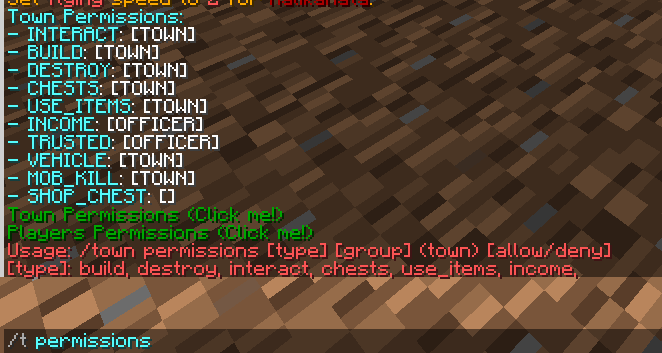
Above is the main town permissions overview screen. It shows all the permissions categories and what grantees have access to them. There is also clickable links to get to the Town Permissions (othertown) and Players Permissions (person) menus.
For basic grantee categories:
/town permissions [type] [group] (town) [allow/deny]
For granting to other towns or specific players:
/town permissions [type] [othertown/person] (name) [allow/deny]
It is recommended to add them for interact and do further editing through the menu for convenience sake.
Refer above for the valid types and groups
When I check Town Permissions this is my overview screen, in my case I have granted the residents of Testgart access to interact and build in my town.
Clicking on Testgart opens up a menu, I can then proceed to add and remove categories as needed. If I press Destroy it will grant it, vice versa if it is already enabled.
The TNT icon at the top right also allows me to nuke their permissions if needed.
Residents is much the same system so it will not be explained in any more depth.
Plot permissions follow very much the same formatting and syntax for the commands as the town permissions. The only key distinction is that the plot must be specified.
For basic grantee categories:
/plot permissions [name] [type] [group] (town) [allow/deny]
For granting to other towns or specific players:
/plot permissions [name] [type] [othertown/person] (name) [allow/deny]
It is recommended to add them for interact and do further editing through the menu for convenience sake.
Refer above for the valid types and groups
Permissions menu is a 1:1 of the earlier examples for town permissions.
Grimur uses an item based economy with EXP as a currency. EXP can appear in the inventory in the form of EXP bottles, emeralds, or emerald blocks. One emerald can be broken down in to 9 EXP bottles, and vice versa. EXP bottles, emeralds, and emerald blocks are unique in being the only items that can be stored in an ender chest. EXP that is stored in a player's level can be bottled by holding bottles and interacting with an enchanting table.
The best method of acquiring EXP comes from the Artificery Table. In this factory various crops can be processed in to emeralds or emerald blocks. Smaller recipes generally use crops from one or two biomes, while larger recipes use crops from every biome but are much more resource efficient.
Every player has the opportunity to gain 4 emeralds every day for logging in and voting using /vote. This is intended as a sort of universal basic income to stimulate trade and give the average player some buying power. After 7 consecutive days of logins a player will receive 3 emeralds instead of 1 for their daily login bonus.
Players can move EXP from their inventory to their level by right clicking while holding emeralds or EXP bottles. This EXP can then be used to enchant tools in the same way as vanilla Minecraft.
Some factories, such as the artificery table, require an initial investment of EXP in their creation. This EXP seed must come from daily logins or from another artificery table.
Some of the more fantastical recipes, such as power armour and tesla guns, use EXP in their creation. Recipes using EXP are generally made in the artificery table.
EXP can be deposited in the town bank to pay for upkeep. Nations and plots also have their own banks. To deposit or withdraw the player must be standing in the appropriate areas. For towns this is the home chunk of the home node. For nations this is the home chunk of the home node of the capital town. For plots this is any where within the confines of the plot. The commands for depositing are as follows:
/t deposit [amount]
To deposit in town bank.
/n deposit [amount]
To deposit in nation bank.
/p deposit [amount]
To deposit in plot bank. Upkeep paid from this bank is deposited in the bank of the town the plot is in.
Every territory requires a specific amount of EXP for upkeep that it withdraws from the bank of the town it is a part of. Upkeep is determined based on the size of the territory, the resource it provides, as well as its tier. If a town can not afford the upkeep for all of it's territories it falls in to collapse, unclaiming all territories and leaving members without a town. Nations also require upkeep, which is calculated by adding all territory upkeeps of all member towns together and multiplying by 0.05, this value will rise to 0.10 one month after launch followed by 0.15 as the final value two months after launch. If a nation can not afford it's upkeep it collapses, leaving all towns independent and freeing any former subjects.
Information regarding Node Tiers is available on our player facing wiki.
GrimurRP has a world height of 0-255 inline with earlier Minecraft versions pre-1.18. This is to allow for greater performance.
A live map is available to view at:
Dynmap / Dynmap (High Res) / Map full image
Note with the map that not all territories shown as claimed are fully claimed. Due to the Sphere of Influence mechanic some of these claims can be overridden (via claiming or making a new town). Unfortunately DynMap implementation to show these is still work in progress.
https://grimurrp.com/GrimurRP11042024.zip
Last Updated: 11/04/2024